I’m a busy mom. Some days the only time I have to paint is late at night after everyone is in bed.
I love using American Paint Company paints because they don’t require a whole lot of prep work and they dry quickly.
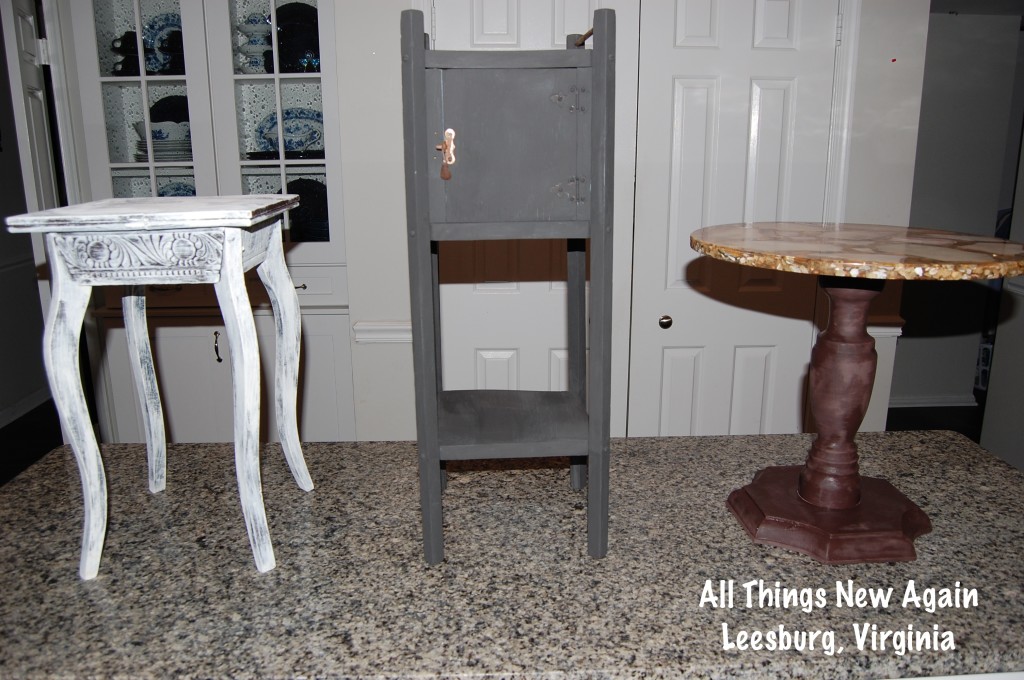
I can work just an hour or two each night and have several finished pieces by the end of the week. I picked up three little tables at a yard sale last weekend.
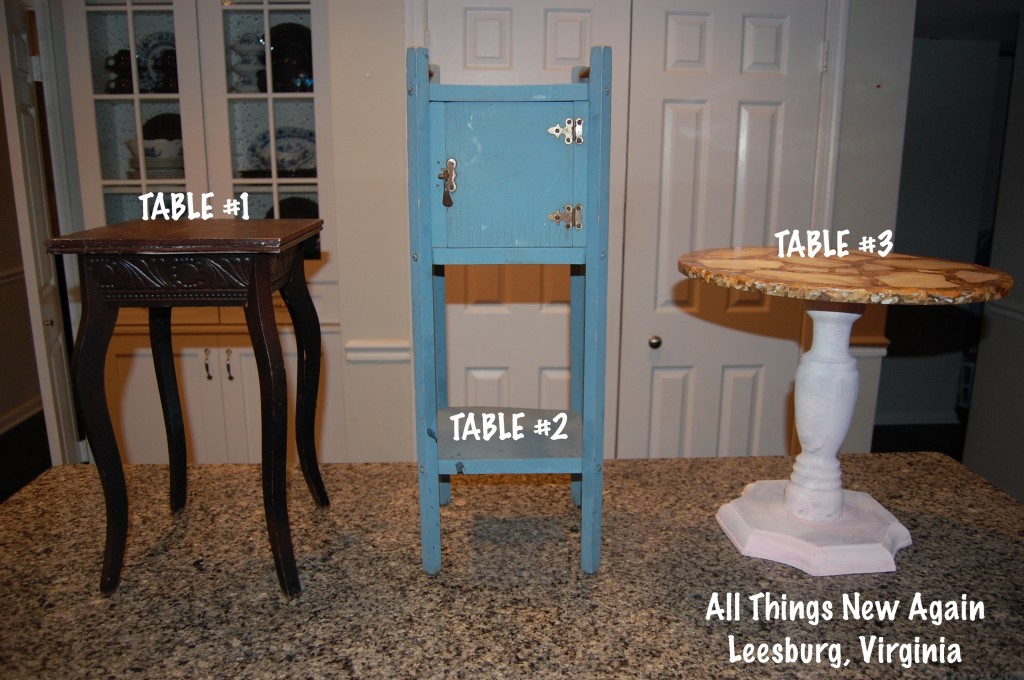
Notice they are sitting on my kitchen counter. I paint right here in the kitchen.
American Paint Company products are 100% all-natural clay/chalk/mineral based paints.
They print the ingredients right on every can so you know exactly what is in the paint—and what isn’t.
No harmful chemicals mean no stinky fumes!
I can paint at the kitchen counter at night and not worry about making peanut butter sandwiches here tomorrow. Any drips or spills wipe up easily with a little kitchen spray so I don’t even bother with a drop cloth. Here’s how I transformed all three of these tables in just a few hours.
Wednesday, 9:30 pm
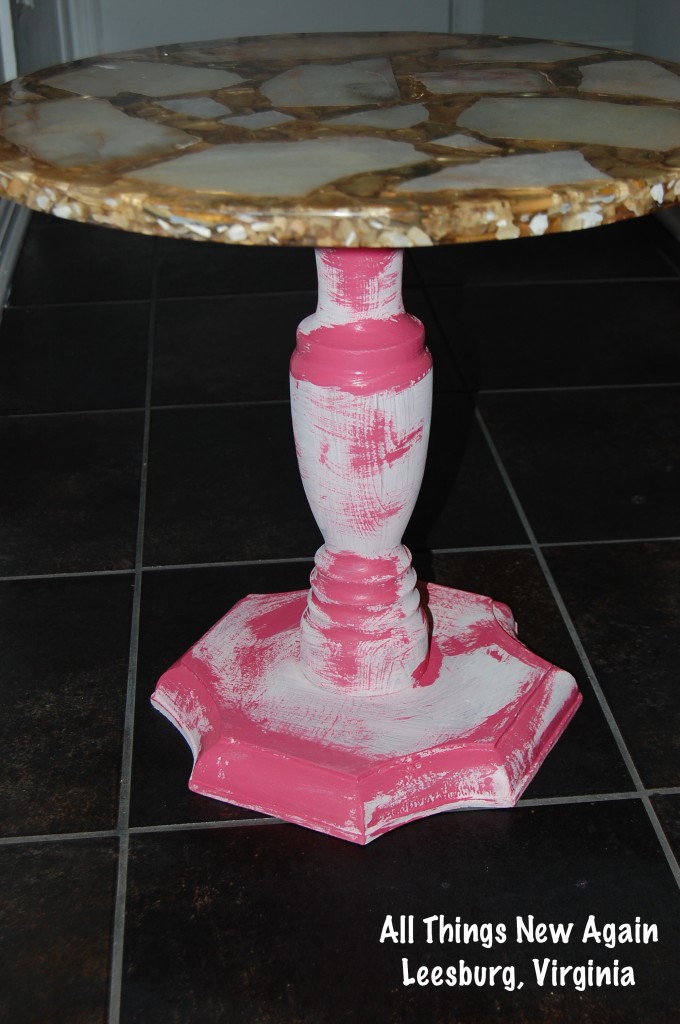
I wiped off all three tables with soapy water. That’s it. No sanding or priming needed. Five minutes later, I was ready to paint. I started with Table #3. The tabletop on this is so cool. The stones are different shades of brown and gold with a hint of pink. A few days ago, I started painting it with creamy white Home Plate and a swirl of hot pink Momma’s Lipstick to match the swirls of pink in the stones. I didn’t like the result. So tonight I’m trying something different. I painted Momma’s Lipstick around the rings and pedestal base. It looks crazy now, I know, but just wait.
9:45 pm
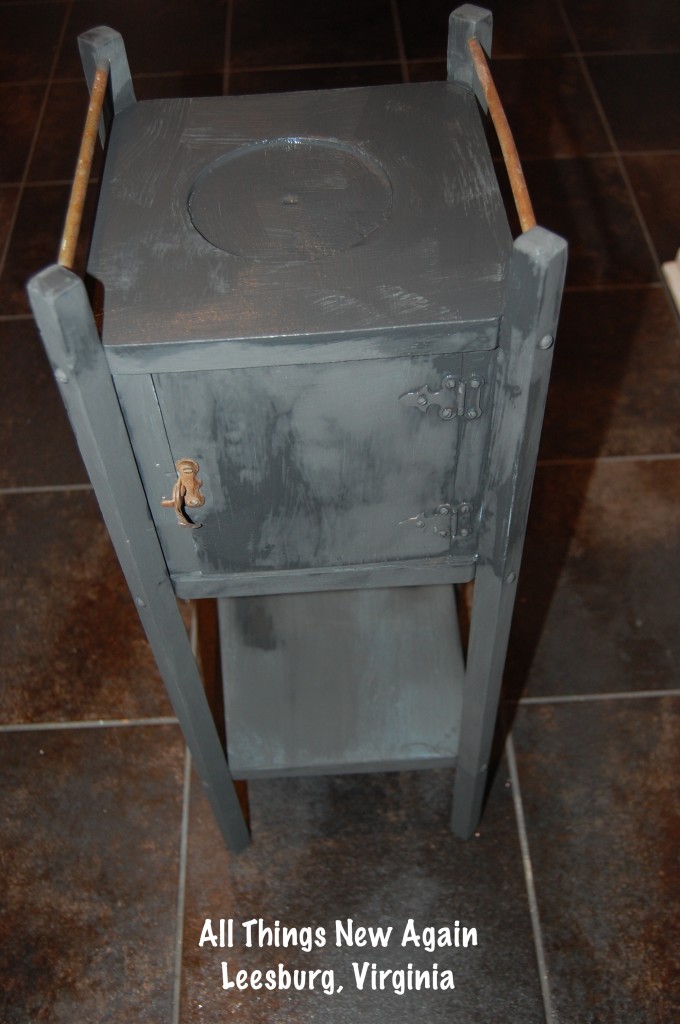
I set Table #3 aside and moved onto Table #2. This table had already been painted a pretty light blue color when I bought it. I would have just left it like this, but there were sloppy splotches of black paint on one of the legs, which you can see in the first photo.
The biggest problem I have with American Paint Company paints is deciding which color to use—all of the colors are so pretty!
This table was easy. I just picked Lincoln’s Hat, a true black color, to cover up the other black paint.
 10:15 pm
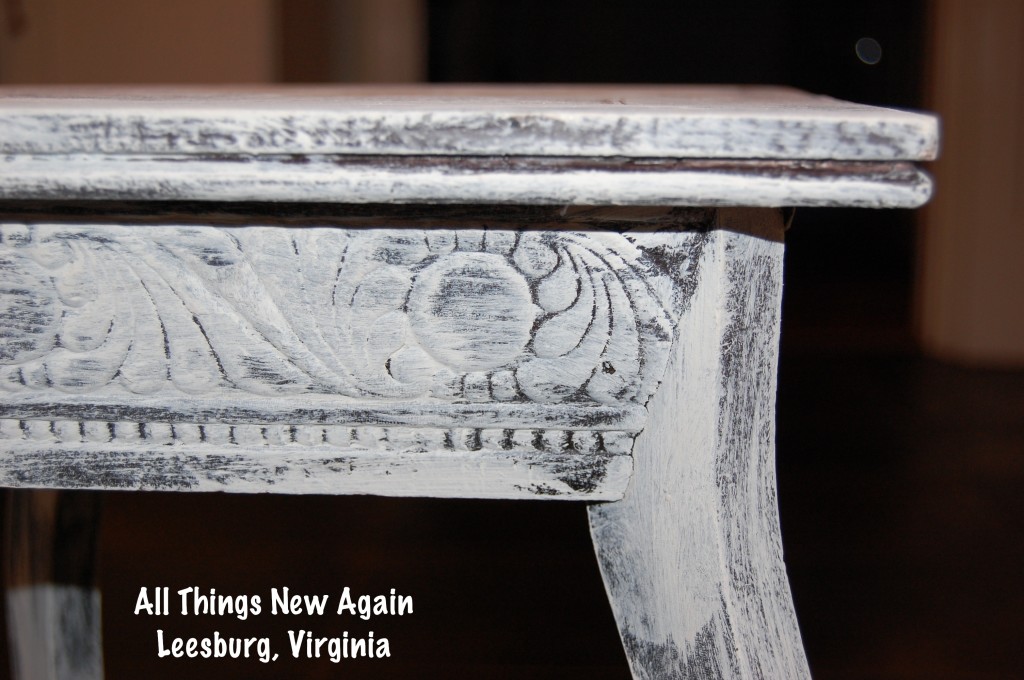
Time to work on Table #1. I dry brushed Home Plate all over. This table is little. The whole thing only took about 10 minutes to complete. I really like the contrast of the original brown table showing through the Home Plate, especially on the carved sections of the table.
10:25 pm
Back to Table #3. The Momma’s Lipstick was dry enough already for me to paint the entire pedestal base with Wild Horses, a rich delicious-looking chocolate brown. I think the darker color works better with the pretty tabletop than the lighter color I originally painted.
10:40 pm
Time to call it a night. I moved my projects over to the dining room table to dry overnight, cleaned all of my brushes, wiped down the counter and was in bed by 11 pm dreaming about how great these tables were going to look when I was done.
Thursday, 9:30 pm
I waxed Table #1 in about 10 minutes using American Paint Company clear wax.
Again, I can do this in my kitchen because the product is all-natural and does not contain ANY harmful chemicals. It doesn’t even smell.
9:40 pm
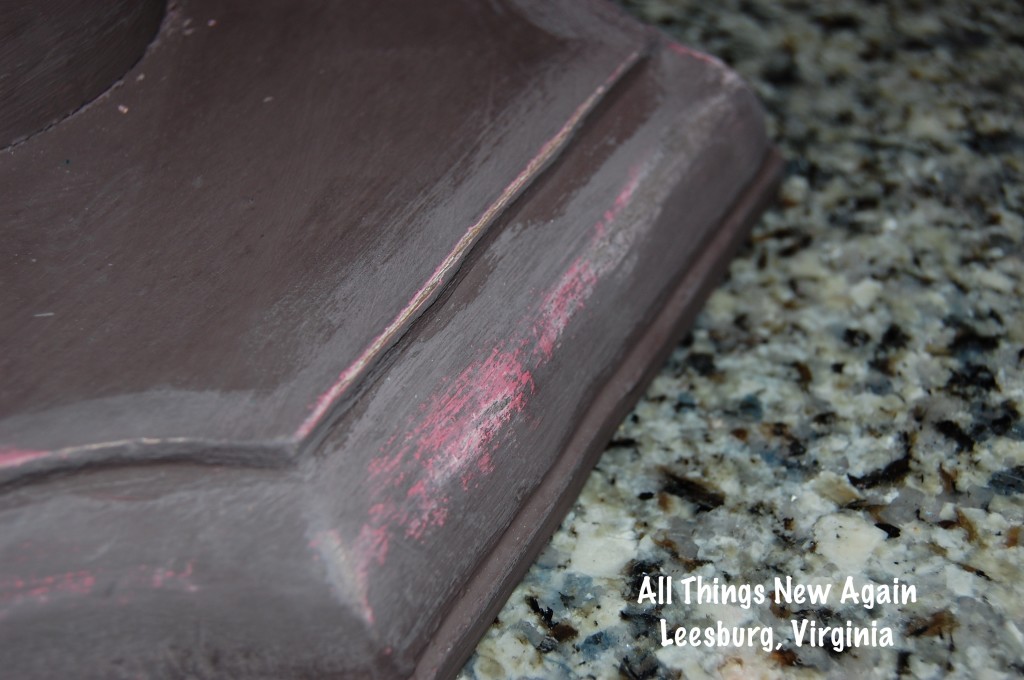
Remember the crazy hot pink I painted on Table #3? I wet-distressed around the rings and pedestal base using a scrubby green sponge and some water. I prefer this method of distressing over sanding with sandpaper when I’m working inside because it does not leave a dusty mess to clean up.
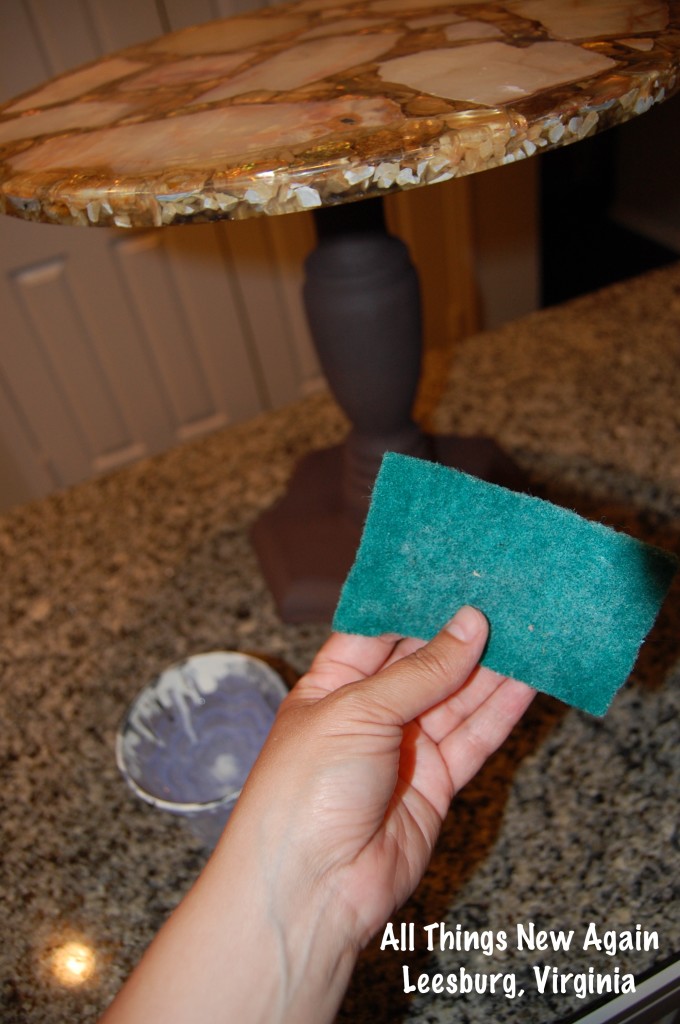
I rubbed a little here and a little there to reveal some of the pink beneath the brown. On some spots, I rubbed a little bit more—all the way to the table’s original wood. This gave the pedestal interesting layers of texture to match the cool tabletop. I could go crazy with wet distressing, but I still had another table to do so I stopped while the pink was still subtle. (Well, as subtle as hot pink can get!)
10 pm
I flipped my scrubby sponge around and used the clean end to do the same wet distressing technique on the black table. This time I did go a little crazy because the original blue color looked so pretty peeking through the black. When I stepped back to look at the whole table, I thought some spots looked a bit “too blue”. No worries—I just painted over those areas with Lincoln’s Hat again. You can come back and distress a little more or paint a little more as many times as you need to until the piece looks perfect to you. But once you apply wax, you are done.
I like to let my pieces sit overnight and look at them again with fresh eyes in the morning so at 10:30 pm, I called it a night, cleaned up and actually went to bed a few minutes early.
Friday morning
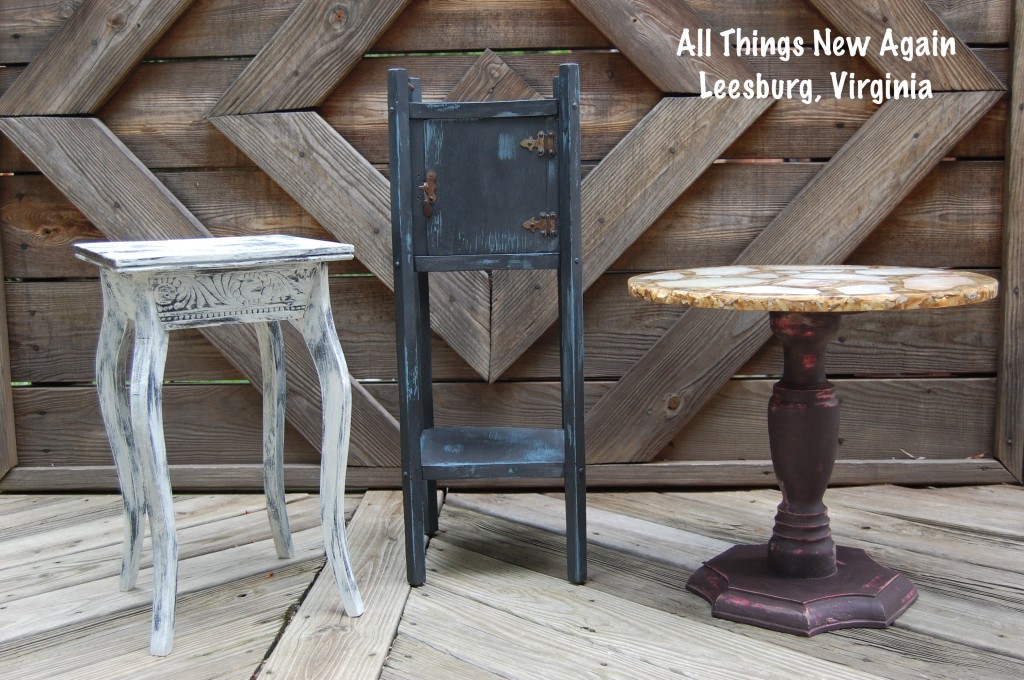
I forgot to mark the time. (I’m really not a morning person!) In the amount of time it took my son to eat a bowl of cereal, I waxed the two remaining tables. How do they look?
I never would have gotten all of this done so quickly if I had to sand and prime and wait a long time for the paint to dry—or if I had to work outside because of the fumes.
Not only are American Paint Company products convenient, they are safe to use around my family—and the results are beautiful!
Now these tables are finished … just in time for another yard sale on Saturday!
Post courtesy of Courtney

Awesome!!