Sometimes (ok– a lot of times!) I can’t decide how to paint a piece of furniture so it just sits in my garage waiting for inspiration to strike.
I didn’t have to wait for this handmade vintage cabinet.
The moment I saw it, I immediately knew two things.
1. That pink top and those purple/white gingham panels just had to GO!
– AND –
2. That wonderfully alligatored old paint on the doors just had to STAY!
That was easy!
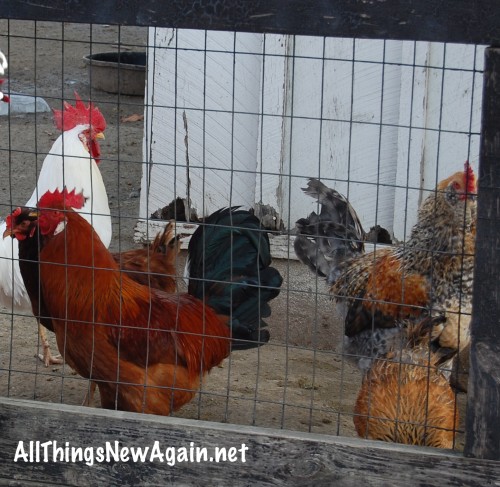
I also knew the door panels would look great covered in chicken wire so I nicknamed this piece The Rooster Cabinet. We recently took our 2-year-old son on a visit to a local farm. We saw a few roosters up close and Joey “cock-a-doodle doo’ed” at them, which I’m not sure they appreciated. However, I came to appreciate just how pretty roosters are with black and brown and bits of red in their feathers.
You never know where inspiration will strike!
I decided to paint The Rooster Cabinet in the same colors as the real deal.
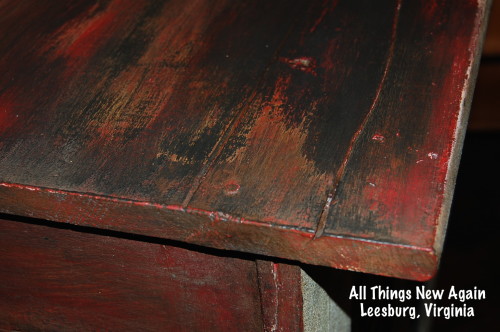
I started by base-coating the top and sides of the cabinet in American Paint Company‘s Fireworks Red. I let it dry for 20 minutes or so.
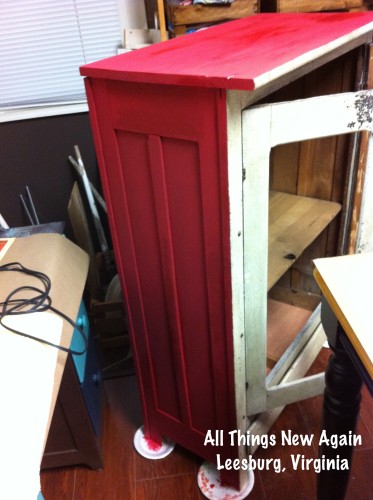
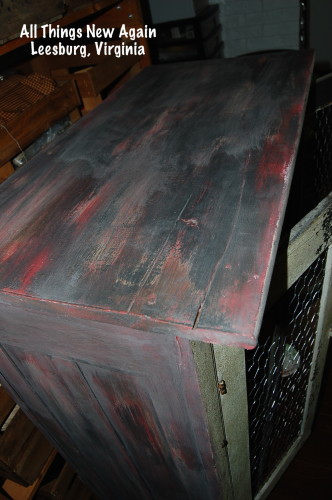
Then I took two more colors, Leather Boots (brown) and Amber Waves of Grain (gold) and just randomly swiped them over the red in spots. Before they dried, I came back and randomly swiped some more red here and there.
Here’s what the cabinet looked like at this point:
It looks a little crazy, doesn’t it? No worries!
Layering colors, then wet distressing to blend and reveal them is a simple technique that—with just a little practice—delivers stunning results.
You can be subtle and layer soft colors together like my mom did with this cool two-tier claw-and-ball-foot table.
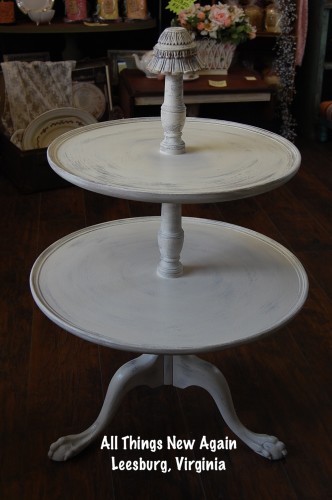
My mom base-coated the table with American Paint Company’s Sackcloth (soft taupe), then swiped on a medium taupe color called Crushed Tea (like I did with the brown and gold on the Rooster Cabinet.) My mom finished her table with a wash of Limoges (creamy ivory). She added water to the Limoges paint until the mixture dripped off the paint brush like a runny faucet.
APC paint is thick!
You can add water—and more water—to it and still get great coverage.
TIP: This trick also helps stretch a can of paint further.
Let the last color dry completely, then come back with a damp cloth or sponge and start rubbing your piece wherever you want to reveal the colors underneath. That’s all there is to it.

While my mom created an elegant finish with her color choices, my Rooster Cabinet is a rustic piece. It has an entirely different look than my mom’s table even though we both used the same techniques.
That’s all part of the fun!
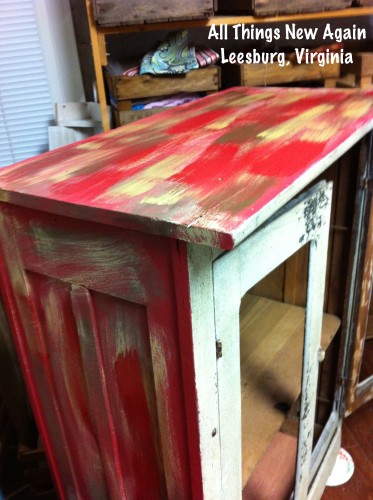
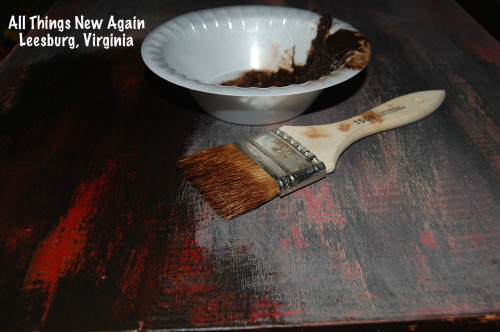
I chose Cannonball for my final layer of color, adding lots of water to it before painting over that crazy swirl of red, brown and gold. You don’t have to be super-careful and you don’t have to cover every inch of your project. (That’s less to rub away later!) When the black dried, I wet distressed it. That’s just a fancy way of saying I rubbed the entire piece like crazy until enough of the other colors showed through to look the way I wanted it to.
Here’s what the cabinet looked like at this point:
The colors look muted and a little dull, don’t they? Again, no worries.
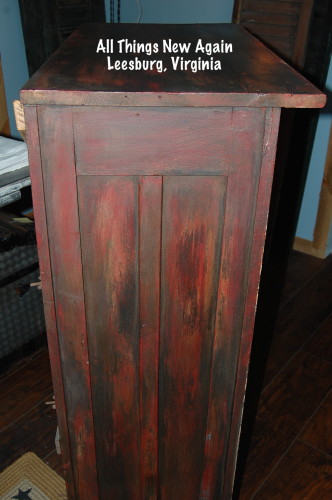
Remember all of those colors will pop and look vibrant again when you wax and buff the piece. I used American Paint Company’s Dark Wax for this piece. This photo clearly shows the difference between the side I waxed and the side I didn’t. Big difference, isn’t it?
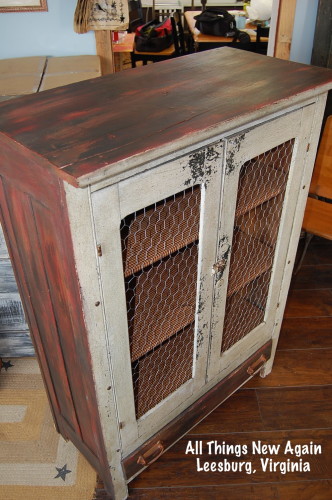
Remember the original crackly paint on the doors? I left it as is and just sealed it with American Paint Company’s Top Coat.
The Handmade Vintage Cabinet Re-Doodle-Do was complete!
Here it is:

Great transformation! I want to paint something with these colors now.
Love it!