How to Revamp an Old Display Case with the Popular Sand Distress Technique
Watch any home improvement show, and you’ll see old furniture transformed into functional, attractive pieces. But these makeovers aren’t just for pros with exorbitant budgets…
With some sandpaper, paint, and a vision, anyone can renovate an outdated piece into something beautiful. American Paint Company customer, Brenda Sorge, sent us the story behind her recent DIY project, and we were so impressed, we just had to share it in this week’s “Share Your Project” post!
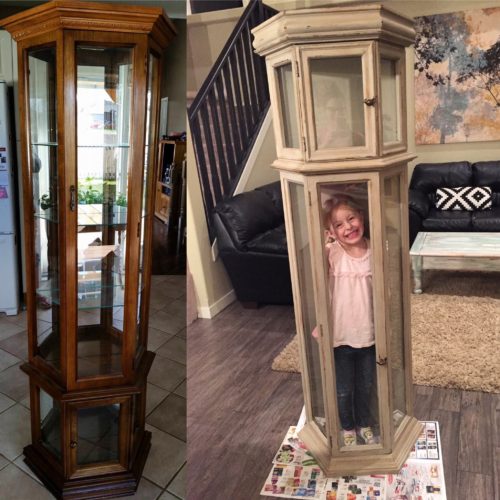
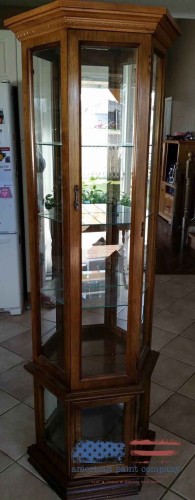
Brenda saw great potential in an old display case she picked up on a Facebook buy/sell group for just $65.
Before tackling the project, she reached out to her local retailer for tips and suggestions. With a little time and a lot of inspiration, Brenda completed the transformation, and her project turned out beautifully!
Here’s how:
Step 1: Prepare to Paint
First, Brenda safeguarded the cabinet’s glass by applying multi-surface painting tape around the edges.
Step 2: Transformation Time
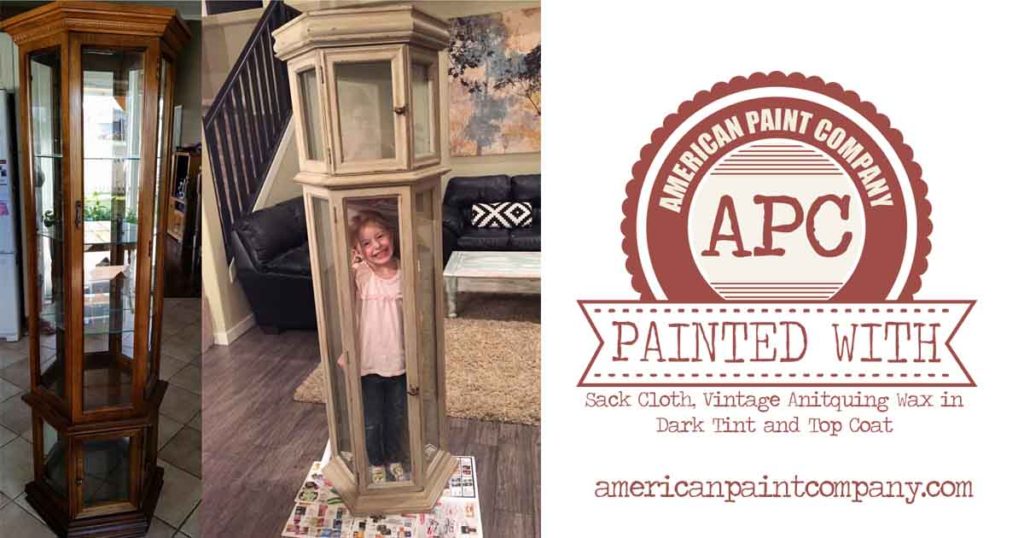
Next, she applied three coats of American Paint Company’s Sackcloth color– a gorgeous, dark tan shade to match her home décor.
Tip: American Paint Company offers 46 paint colors, making it easy to find the perfect shade for your own unique style.
Step 3: Distress without the Stress
After allowing the paint to dry, Brenda sanded the areas where she wished to reveal the original color of the cabinet. This is the increasingly popular ‘sand distress’ technique, where you use sand paper to distress and create an antique look.
Step 4: Time to Wax
To add character to the piece, Brenda applied our Vintage Antiquing Wax in the Dark finish. This revolutionary, all-natural wax comes in White, Black, Dark, and Clear, goes on smoothly, and has no smell whatsoever. Brenda was able to complete her project indoors, making the project even more enjoyable!
Note: The wax hardens quickly, but can take up to 3 weeks to completely cure.

Step 5: Seal the Deal
To complete the transformation, Brenda applied our Top Coat sealer and added “the perfect knobs” to the cabinet. “I’m in love with how it turned out,” she told us after completing the project.
Tip: For increased durability and an ‘aged’ look, apply our Top Coat sealer first and follow with our Vintage Antiquing Wax. Top Coat offers a ‘shinier’ finish, and so sometimes painters will add the Wax on top to obtain a ‘matte’ finish.
As you can see, Brenda pulled-off an epic makeover! Her before/after photos are truly an inspiration, and proof that any furniture piece can be transformed into something new, beautiful, and functional!
Share your project pictures with us and you could win a $100 Gift Box! We want to showcase your projects of love. Use the Project Submission tool on our site today and you could be our next feature. You’ll automatically be entered to win the monthly Gift Box!
For social media posts, use #americanpaintcompany
By: Kelly Spears

Is is advisable to prime new wood before chalk painting with you products. This will be an outside piece that is under a covered patio but may sometimes get wet due to winds