
Get Plastered!
How to use Venetian Plaster 101
What’s in the Box? Series
Challenge Your Creativity
Welcome to this week’s edition of “What’s in the Box”! If you’re new around here, check out this post here to read up about the series and how you can play along! And read along to check out this amazing transformation of a common dollar store frame and learn how to use Venetian Plaster!
Our painter had the lovely opportunity of playing with our Venetian plaster this week! The product lineup of her box consisted of the following:
- Venetian Plaster (Cannonball and Shoreline)
- Copper Mica Powder
- Black Vintage Antiquing Wax
Just a few things to note about Venetian Plaster. It’s thick! It’s a Clay, Chalk, Mineral base plaster and can be molded into different patterns and textures to provide a 3D effect. Hence, they work amazingly well with stencils or decorative rollers. As they are quite thick, it can take some time for the plaster to fully dry. Without help, the plaster takes about an hour to dry. With help, aka a blow dryer, drying time lessens to 7-10 minutes. So do yourself a favor and grab your blow dryer!
Pick a Project
For this box, common dollar store frames were chosen to unleash all the creative prowess. But just like most APC products, the Venetian plaster adheres to many different surfaces. Notice that no priming or initial work was required to prep the frames!
Pro tip: Mix your Venetian Plaster with a stir stick and use said stick to apply to your project!
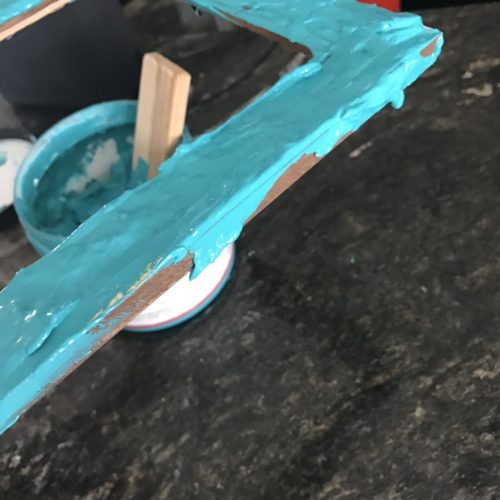
Apply & Texturize
Apply the plaster to the frame. You can apply the plaster with the same stir stick, or use a putty knife, a plastic knife or spoon, or even a trowel if the project warrants it. Cover the entire surface of the frame. Once completely covered, texturize to your heart’s content! Using the stir stick, little peaks were produced for this project using a swirling method. Check out a quick tutorial video here.
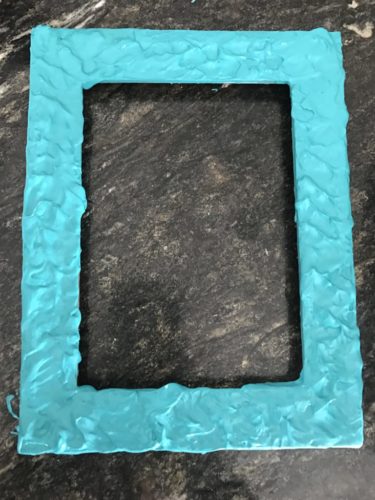
Once you are satisfied with the 3D effects achieved, it’s time to let it dry! As suggested above, our lovely painter used a blow dryer to dry the plaster before moving on to the finishing details. As this plaster was heavily applied, it took a lot of blow drying to love to get it ready for the next steps. Thinner layers of Venetian plaster will take less time to dry.
Pro tip: Keep your blow dryer a safe distance away from your piece/plaster. Getting too close will cause cracks in the plaster. Which is cool if you like that kind of thing…
Finish & Embellish
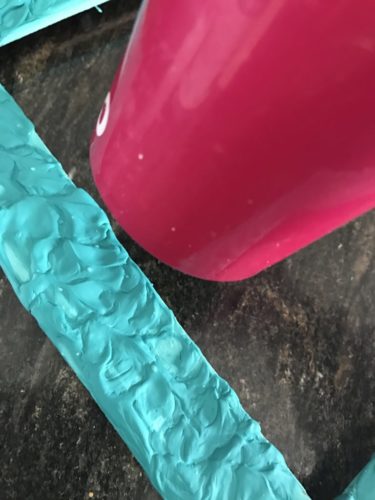
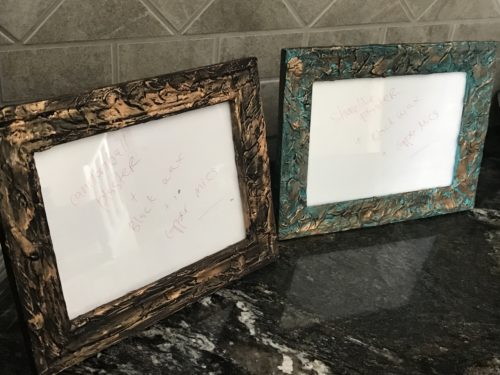
Now, let’s get to the real decorative genius of this project! Black Vintage Antiquing Wax was applied with a rag to the plastered frame, completely changing the funky tone of the frame to a more serious one. However, note that the Shoreline blue still shines through. The wax was used sparingly to add extra dimension to the frame.
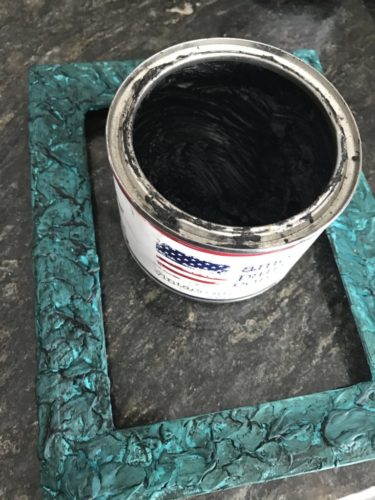
Lastly, she pulled out the Mica Powder! Mica Powder can be applied in a variety of ways. Mix it with your favorite sealer and get a faint shimmer. Or dab it on while your sealer is still wet for a more dramatic effect. Or wipe it on after the wax was applied, like seen here. You don’t need any special tools, a finger will do!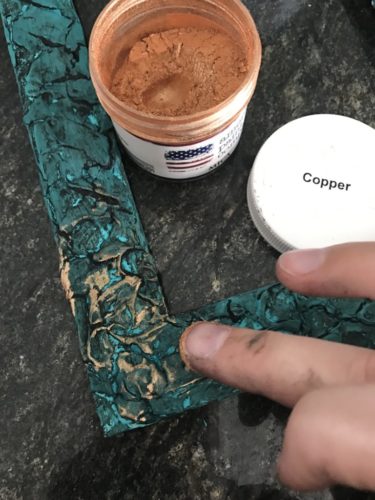
We love how the end result turned out! Cannonball black plaster was used as the base on the second picture frame, but all other steps remained the same. Totally transforming these basic frames into something you’d find in Ariel’s secret grotto or an undersea treasure chest!
Now it’s your turn! We hope that this post has inspired you to try your hand at a decorative project with these 3 products! Nothing come to mind? Check out last week’s post, or stay tuned for next week’s “What’s in the Box” edition.

We Love to Hear From You